Your first Plan
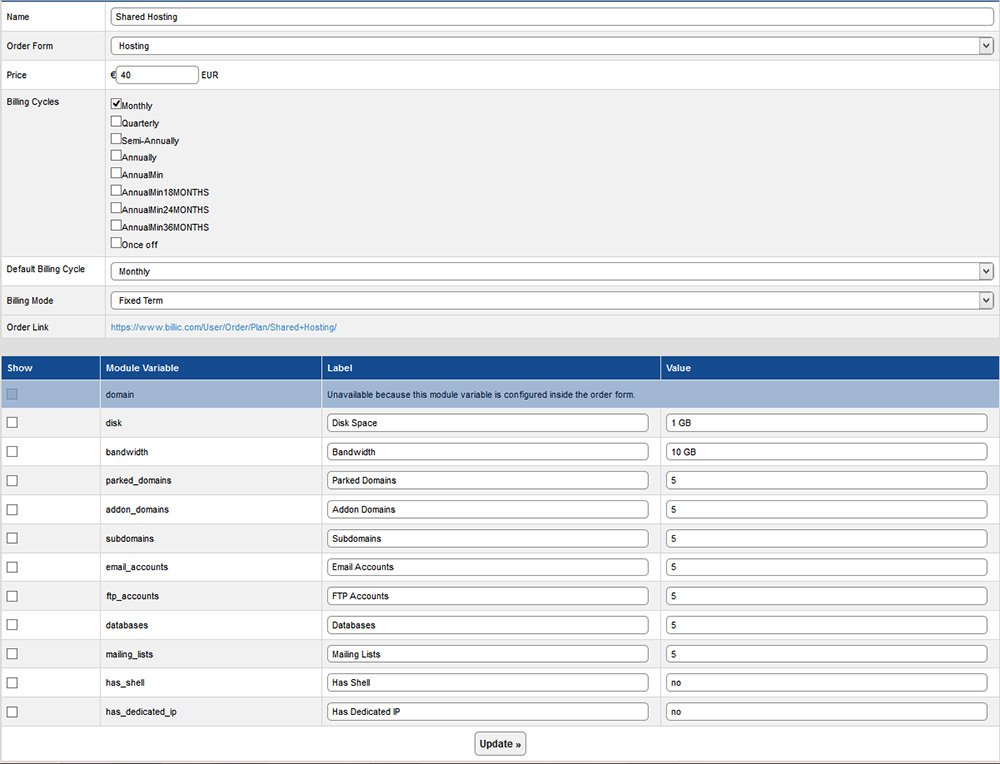
1. Go to Ordering - Plans2. Choose your plan name, for example Shared Hosting and click continue.
3. Choose your order form that you would like to use, for example we are going to use the form Hosting that we created in the Your first Order Form tutorial.
4. Choose your price and Billing Cycles, then choose your Billing Mode: Fixed Term or Pro Rata then click update
As you can see with the below image, you can configure disk space, bandwidth etc etc if you didnt set them up in the order form. This allows you to setup custom hosting plans in the order form aswell as having predefined hosting plans.
5. The "Show" option will show the Label and Value to your end-user. It allows the end-user to see what their service has been configured as. If there is any sensitive or unprofessional information to not be shown to your end-user you should leave this unchecked.
6. The "Autogen" option allows you to automatically generate information based on the service. For example, let's say we need to generate a Hostname for a service in the form of server32156.yourdomain.com where 32156 is the ID of the service. You would check the Autogen box and put this into the "Value" field: server{$id}.yourdomain.com
Previous: Getting Started » Your first Order Form