SolusVM
Step 1: Create API Key
In SolusVM click Configuration > API Users > Create API User.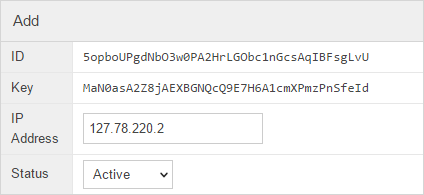
Step 2: Billic Settings
In Billic go to Settings > Settings > SolusVM.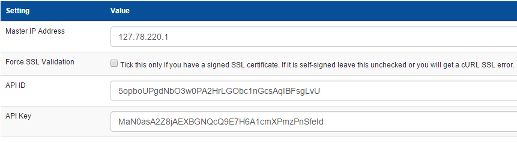
Step 3: Module Variables
Take a quick look at the module variables. These variables are used in the Order Form and Plans and passed to SolusVM to set limits and any kind of configurable option. You will see examples of them used below.| Variable | Required | Description |
|---|---|---|
| domain | Yes | The hostname of the VM. This can be entered into a text box during the order process or automatically generated by billic using the service ID. |
| type | Yes | Type of the VM openvz, xen, xen hvm or kvm |
| nodegroup | Yes | The ID of a nodegroup inside SolusVM. Can be used to group types of servers and locations. |
| plan | Yes | Name of the plan inside SolusVM |
| template | Yes | Template or ISO name |
| ips | Yes | Number of IPv4 to assign to the VM |
| custommemory | No | Amount of Memory to assign in MB (overrides the plan setting inside SolusVM) If type is OpenVZ then you can optionally specify the value in the format of 512:768 which would mean 512 MB Guaranteed and 768 MB Burstable. |
| customdiskspace | No | Amount of Disk Space to assign in GB (overrides the plan setting inside SolusVM) |
| custombandwidth | No | Amount of Bandwidth to assign in GB (overrides the plan setting inside SolusVM) |
| customcpu | No | Amount of CPU Cores to assign (overrides the plan setting inside SolusVM) |
| issuelicense | No | When value is set SolusVM will issue a monthly cPanel license. 1 = Monthly license 2 = Yearly license |
| internalip | No | default is 0 (At the time of writing SolusVM documentation has no description about what this does) |
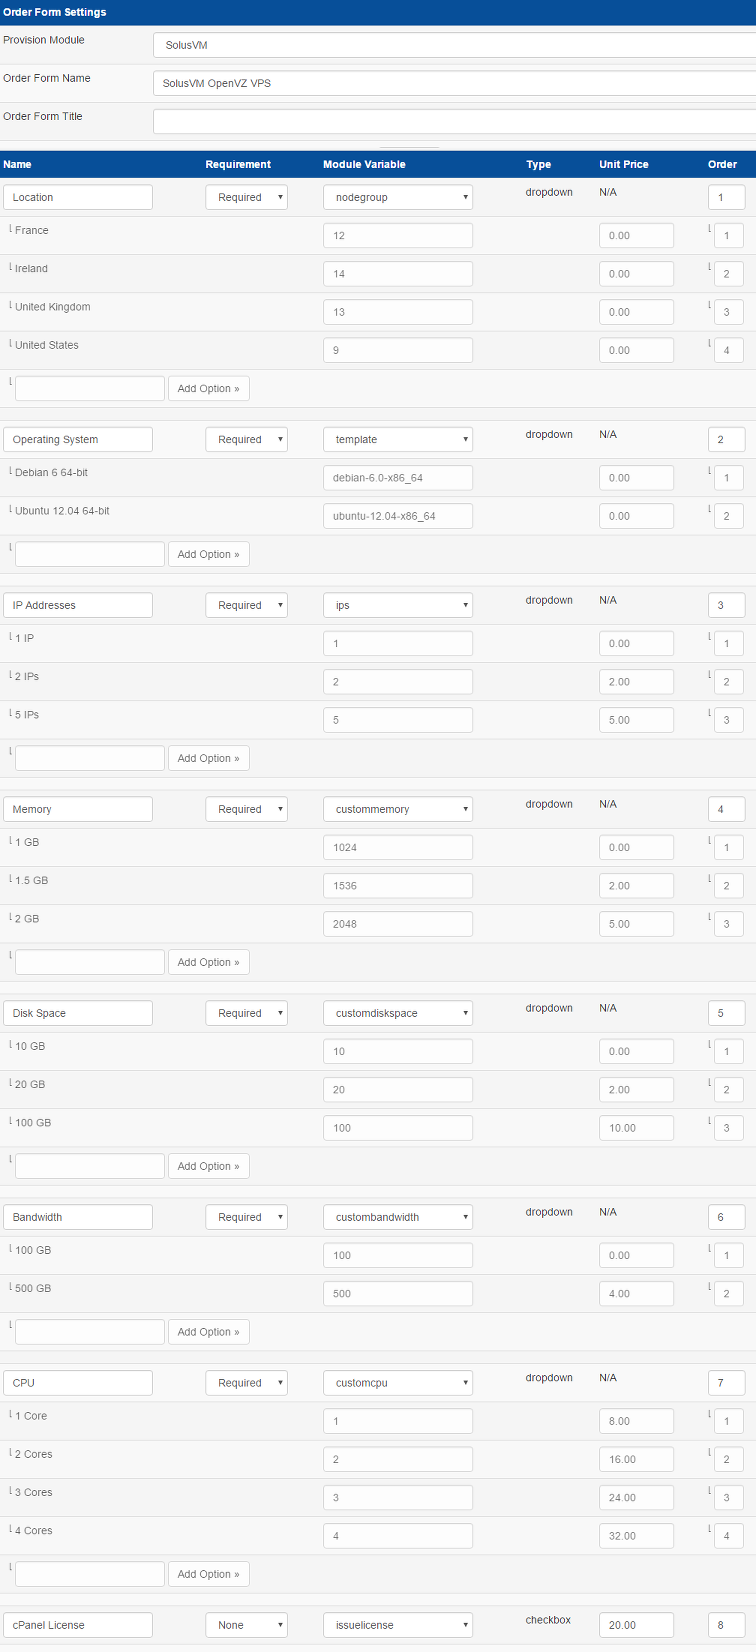
Step 4: Billic Order Form
In Billic you need to create an Order Form. Go to Ordering > Order Forms > New Order Form.In an order form you put settings which will be the same for all the plans you create using the order form. That way you don't need to copy and paste the same values over and over for every plan.
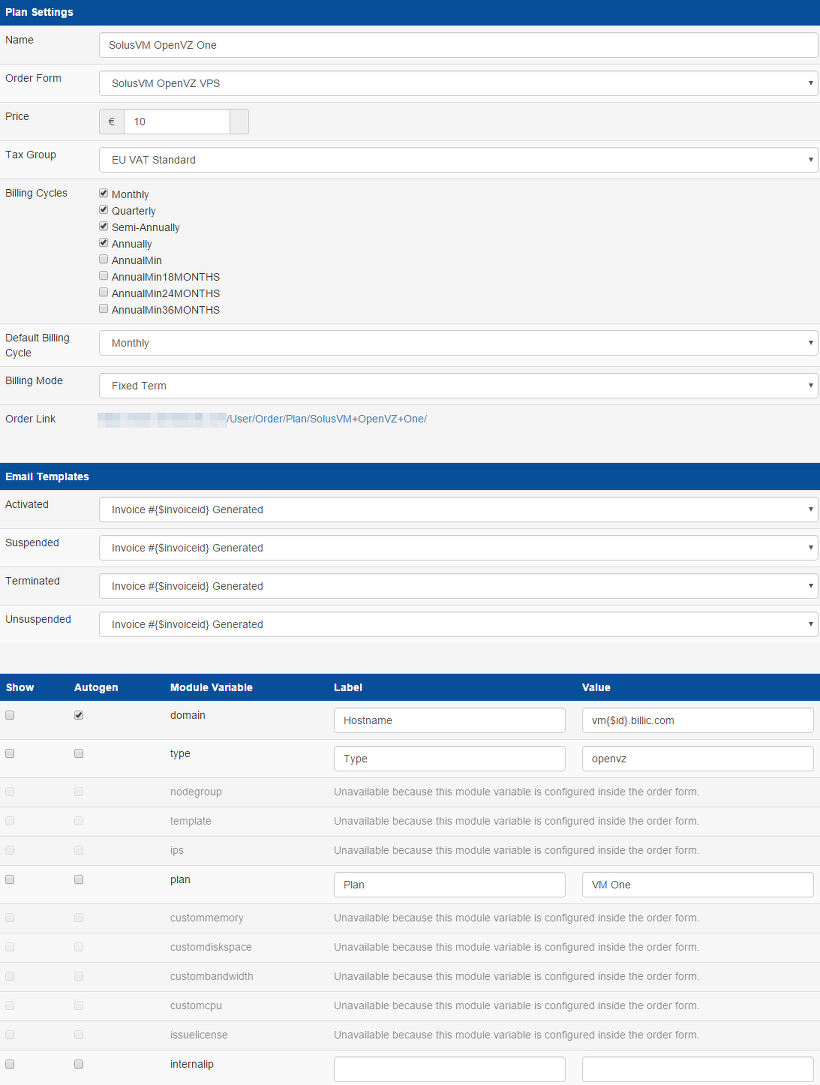
Step 5: Billic Plan
After you create an Order Form you can then create plans for it. Go to Ordering > Plans > New Plan.The Module Settings will show up when you select the order form and then click Update.